
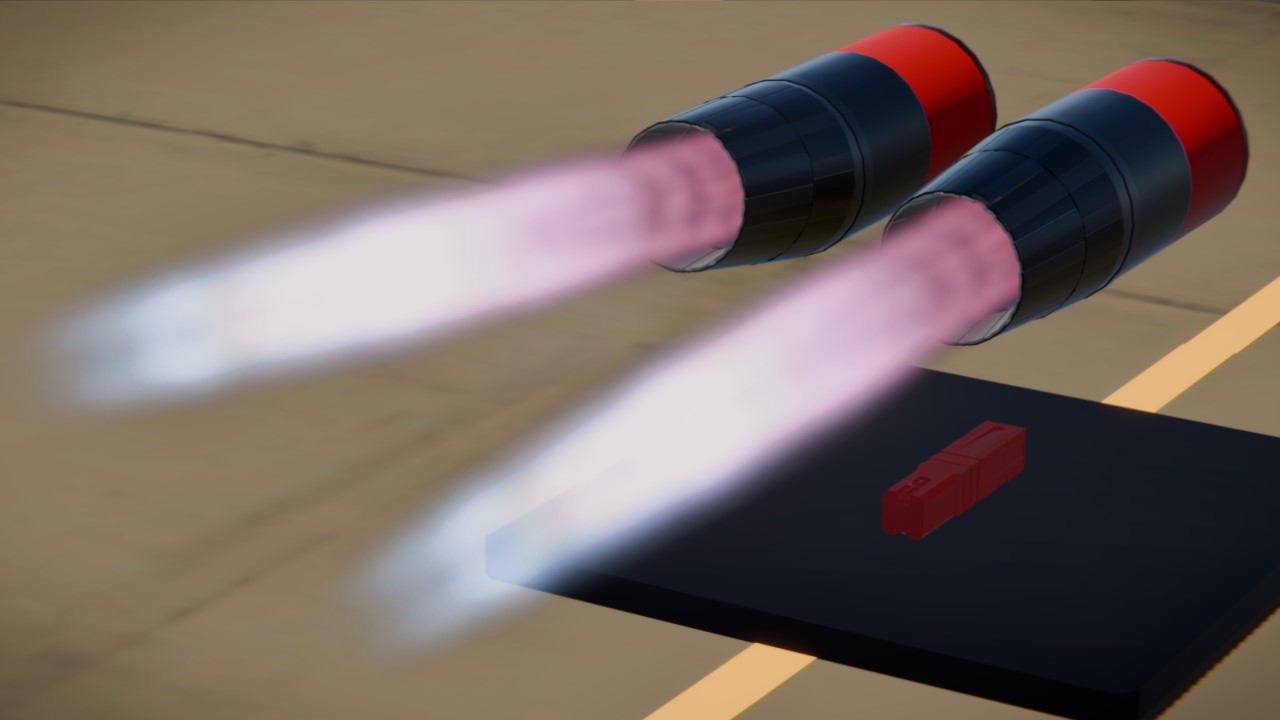
Version 3 of my Custom Nozzle Afterburner Engine

A realistic thrust-vectoring nozzle assembly. Nozzles contract when increasing thrust, but expand when afterburners are turned on (100% thrust + Activate1).
The engines are purely decorative and do not provide any thrust.
412 parts per engine. Consider using the low part-count variant (296) if this is too high for you.
Knowledge of the connections editor, Overload, Fine Tuner, and raw xml file editing is recommended before using these engines.
Please read the documentation before using!
Features:
Realistic nozzle geometry — Triple-linkage nozzle petals simulate a realistic transformation between subsonic and supersonic converging-diverging geometry. The overall design is based on the Saturn Al-31 on Su-30s.
Thrust vectoring — Up to three-axis thrust vectoring with realistic radial limits. The single-engine model has yaw and pitch controls, the twin-engine model has yaw and combined pitch and roll controls.
Measures against VTOl nozzle bug — VTOL nozzles tend to "flash" when the VTOL engine output is 0 (off). This design automatically retracts the VTOL nozzles out of view to hide this using a linear actuator (see: technical breakdown, part G). The rotation of the nozzle petals and VTOL nozzles are thus independent.
Even VTOL nozzle exhaust scaling — Afterburner exhausts are scaled on evenly on all 3 axes, so perform consistently across all orientations.
Realistic decorative assembly — Real engine components are suggested: Afterburner fuel injector rings, central axle, stator vanes, and free-rotating turbine blades. An additional engine provides a soft glow behind the turbine to simulate combustion.
No variables required during installation — All FunkyTree expressions are self-contained in the parts and do not require setup with the variables editor.
Low aircraft flight-model impact — All parts are have disableAircraftCollisions set to true, partCollisionResponse set to None, are dragless, and massless with the exception of some parts connected to rotators.
Warnings:
Not mirror friendly. Duplicate engines with the sub-assembly page only.
The engines with thrust vectoring are mutually exclusive. Eg., do not add two "left" engines from the "twin" configuration onto the same aircraft.
Most parts have very particular connection points. If you accidentally detach a piece, do not attempt to fix it, just re-download.
Due to SimplePlanes physics regarding stacked rotators, the nozzle may not perform correctly and deform at extreme accelerations.
Additional Notes:
For PC users, the "solidness" of the afterburner effects are dependent on the number of VTOL nozzles in use. Using a single engine gives the best plume that deteriorates with each successive engine added. As far as I can see, mobile users will see a "broken-up" effect regardless of nozzle quantity.
These engines were built on PC, with physics set to high. I have tested it on mobile with the same settings, and it seemed to work too. I can not guarantee the same performance if you run lower settings!
Instructions:
Detach your desired engine(s) and the VTOl engine and save them individually as sub-assemblies (if you are using the "twin" engines, you should have three sub-assemblies in total). Make sure to only detach via parts coloured in red.
Load your desired aircraft, load in the sub-assemblies.
Manually connect the engines to your aircraft via parts coloured in red only.
Place the VTOL engine within the aircraft, scaling down if desired.
Add an additional engine to provide actual (non-afterburning) thrust, supplement with additional inlets if required.
Optional Instructions:
Scaling — Scale the engines to your target diameter using Fine Tuner's scale tool. Make sure no parts are selected prior and turn “calculate mass” off, “scale relative” on, “scale engine power” off, and "scale only selected parts" off.
Scale-factor = target diameter/3.8, where 3.8 = default engine diameter.
The “Multiplier” value of the VTOL nozzle linear actuator (see: technical breakdown, part G) will also need to be multiplied by the scale-factor. Make sure to evaluate the expression.
Multiplier = Scale-factor*2.5, where 2.5 = default value
Changing afterburner exhaust colours — Locate and open the xml file for your aircraft; I recommend using an editor like Visual Studio Code.
The VTOL nozzles currently have the variable "exhaustStartColorOverridePrimary" set to A8D3FFFF and FFC400FF for the outer and inner VTOL rings respectively, as HTML Hex codes.
Perform a find-and-replace to change them to your desired value (keep in mind the final 2 values, FF, dictate opacity), save the xml file, and reload your aircraft (if you're on PC, you do not need to relaunch the game).
Changing afterburner activation group — Repeat the same steps as above, but use find-and-replace to change instances of "Activate1" to your desired activation group, ie. "Activate2". There should be 1227 instances.
Afterburner thrust — If you want the afterburners to provide thrust (and thus thrust-vectoring!), change the powerMultiplier variable in the VTOL engine to >0 using Overload.
Technical breakdown:
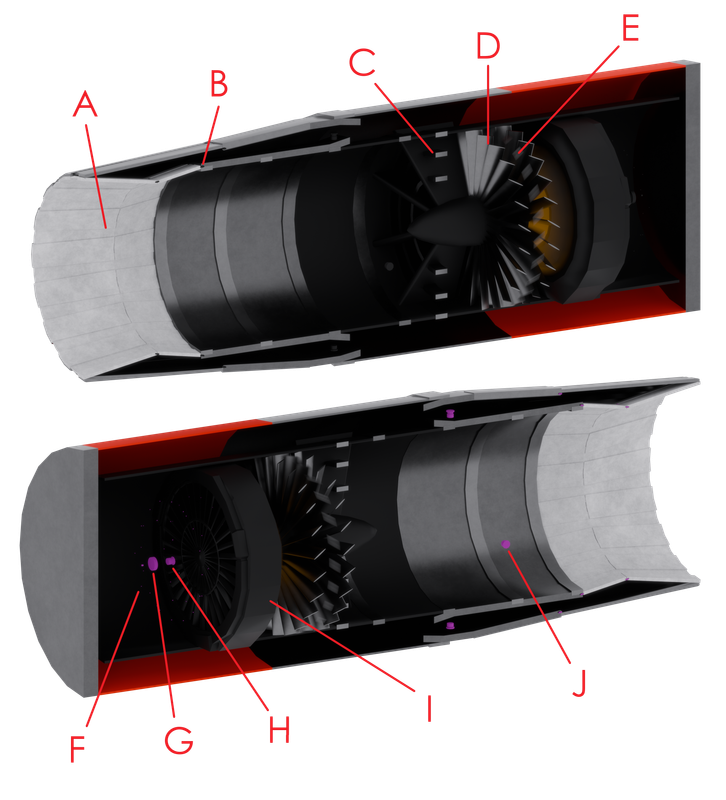
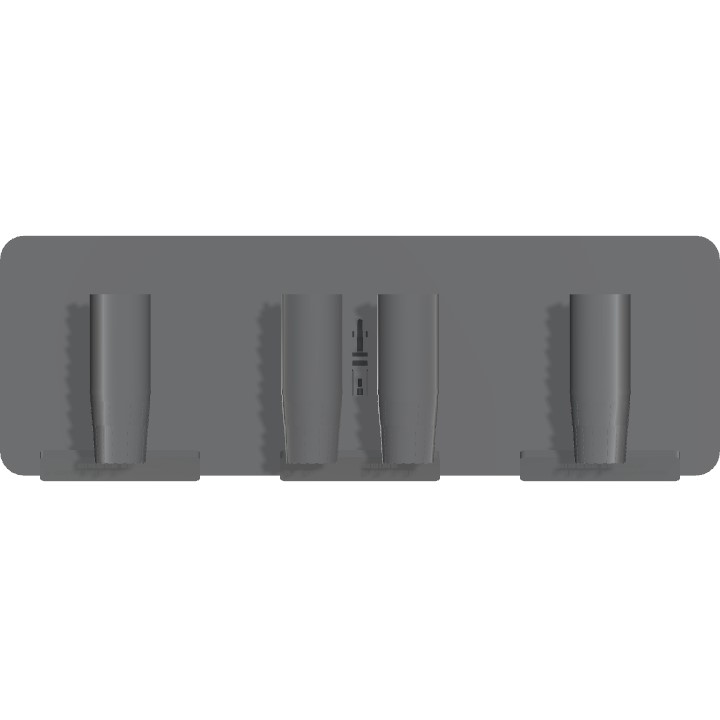
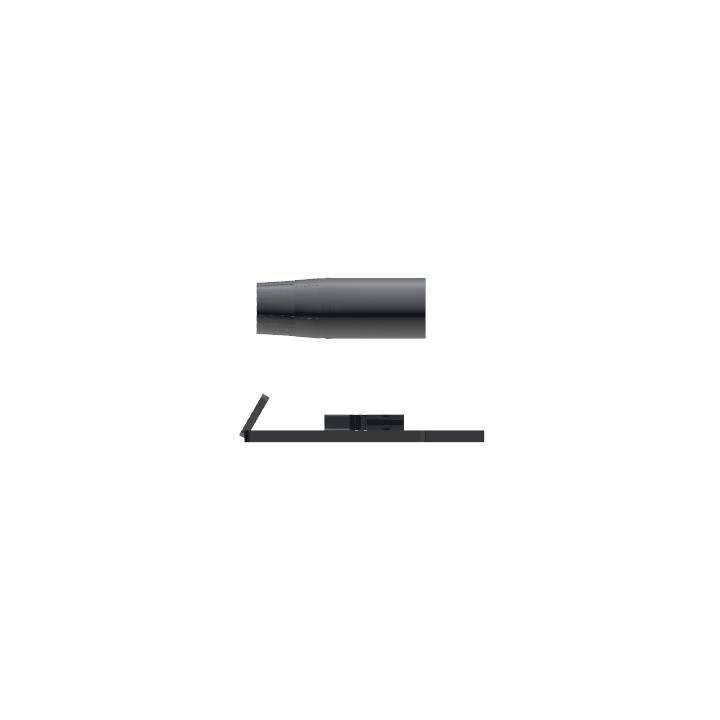
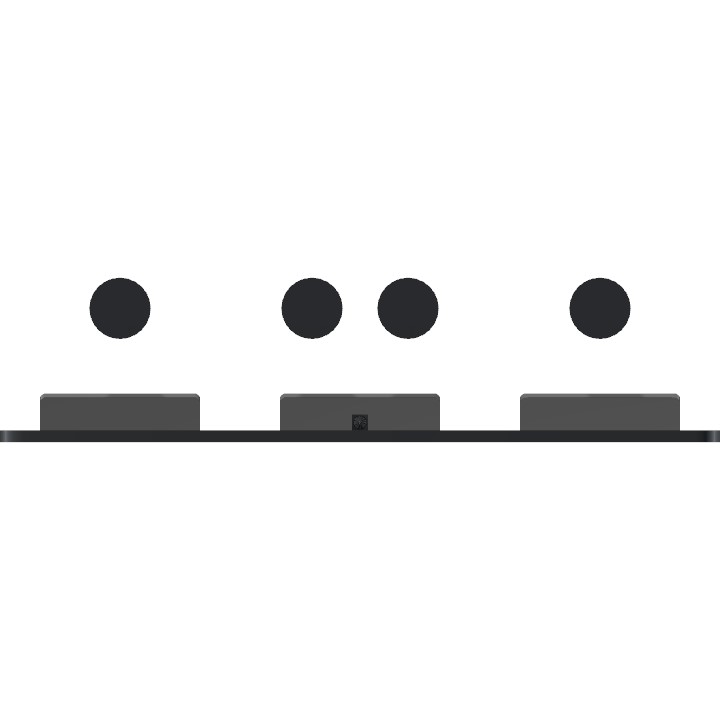
A. Nozzle petals
B. Nozzle petal rotators
C. Afterburner fuel injector rings (decorative)
D. Stator vanes (decorative)
E. Turbine blades (decorative)
F. Afterburner VFX VTOL nozzles (retracted position, scaled to 0.01)
G. VTOL nozzle linear actuator
H. VTOL nozzle linear actuator controller*
I. Engine "bulkhead" (decorative + VFX)
J. Nozzle thrust vectoring rotators**
*Control Bases do not evaluate multi-variable FunkyTree inputs correctly. This is solved by using a rotator and linking the rotator angle output to the Control Base.
**Rotators on the +X and +Y side handle nozzle rotation, while rotators on the -X and -Y side handle VTOL nozzle rotation.
Colouring:
The engine parts are assigned to material indices 16 to 19

Feel free to use! Credit would be appreciated :)
If you have any questions or need help, don't hesitate to leave a comment.
Disclaimers:
All still images with afterburners on were composited from multiple screenshots to simulate the effect you get with a single engine, on PC.
The technical breakdown diagram was rendered with Blender.
Specifications
Spotlights
- VenusLancer one month ago
- RicardoACE one month ago
- DwiAngkasaAeronautics one month ago
- Dissent3R one month ago
- TheMouse one month ago
- ToeTips one month ago
- IAmSteve one month ago
General Characteristics
- Created On Windows
- Wingspan 73.8ft (22.5m)
- Length 25.5ft (7.8m)
- Height 16.9ft (5.1m)
- Empty Weight N/A
- Loaded Weight 88,930lbs (40,338kg)
Performance
- Wing Loading N/A
- Wing Area 0.0ft2 (0.0m2)
- Drag Points 5913
Parts
- Number of Parts 1653
- Control Surfaces 0
- Performance Cost 13,224
Ahh I see.
Anyways, welcome to Platinum. I own you now.
@Graingy the complexity comes from the nozzle needing to wait for the afterburner plume to retract before closing back up. For clarity in my explanation, the nozzle rotators use 0 for fully open, 1 for fully contracted, 0.1 for afterburner.
(Throttle=1?(Activate1=true?0.1:1):Throttle)This is the main controller, binds nozzles to Throttle unless throttle is maxed, at which point it follows Activate1 — toggling between 0.1 and 1.
smooth(Throttle=1?clamp01(Activate1):0,0.75)>0.25?0.1:This part forces the nozzles to wait until the plume has retracted by 75% before contracting when the Activate1 is turned off. This is done so the nozzles don’t clip into the plume. 1/0.75 is roughly the time the afterburner flame needs to extend/retract.
This waiting behaviour is ignored when Activate1 is turned on. The operator finds the output is <0.25, and looks at the earlier expression I described, which returns 0.1.
The final smooth function just makes sure they don’t move too quick (I find it’s easier to control rotators if I set them to a high speed, and slow them down later with their input).
Hope this helps, and thanks for pushing me into the platinum club!
Oh, this was only 11 days ago.
Anyways, I'm gonna crack into these like a particularly hard pistachio. I do not have fingers.
Though I am curious about the degree of complexity.
Does this really need to be this complicated? I can't work out what exactly it needs to do by being this intricate.
Extraordinary work, finally a good looking afterburner.
THIS IS NEATWESOMAZING :D
@F8boa Thank you! Glad everything worked out
update: got everything to work, thanks so much. This is such a beautiful engine!
@F8boa You can put the vtol engine effectively anywhere you want, but yeah in a non-moving section in the body would be ideal
@CheeseTruffles oh and do I make the vtol engine attached to the moving nozzle and then scale it down or do I just put it in the non moving section attached to the body of the aircraft?
@CheeseTruffles ok thanks for everything, the sagging was because I calculated mass on the scaling tool, it no longer sags, that was just me forgetting that they shouldn’t have mass in the first place.
@F8boa The linear actuator pulls the VTOL nozzles out of view when they’re not in use, as there’s a bug that causes unsightly “flashing” when they’re turned off. However, the distance it pulls the nozzles is global, and doesn’t scale when the part is scaled. Because of this, you have to manually adjust the distance it moves: in the part’s settings, you should find a value called “Multiplier” set to 2.5 (not 2.6, that was a typo on my part). Change it to 1.75 if you’re scaling the engine down to 70%. You do not need to change the scale of the linear actuator part itself.
To enable thrust vectoring, increase the powerMultiplier value in the VTOL engine, not the nozzles! It’s the large red rectangle attached to the baseplate.
As for why it’s sagging, I don’t have much clue, I tested it with a bunch of my existing planes and didn’t see any issues… try changing the massScales of your aircraft frame, SP can be finicky with part masses and rotators.
Oh one more thing, I might just be doing something wrong but when attaching the engines onto an aircraft I noticed that they kind of sag. I scaled them to 70% (x.7) and then did 2.5x.7=1.75 and then scaled the linear actuator by that in all axis. Am I doing something incorrectly?
Edit: I am going to use the diameter equation as I didn’t use that, sorry.
Also which vtol nozzle do we change to allow for thrust vectoring? Is it a variable? Cause I don’t see any vtol nozzles in the variable setter screen
What’s the purpose of the nozzle linear actuator multiplier scaling?
It's really cool
I can tell just by looking at the build a little bit how much time you've invested.👍
LITERALLY HOW???
@ZeroWithSlashedO The trick is to first attach a single nozzle to a single central fuselage piece (you can see it in the technical breakdown diagram, the purple piece just left of part G). Create a subassembly of the fuselage piece with the nozzle attached and create a bunch of copies. Then, copy paste the coordinates of the original into each one while also rotating them, such that they’re all stacked on each other. Finally, delete all but one central piece and manually reconnect the nozzles to it. It’s a lengthy process that I did about 200 times.
Very nice! love ur engine man 👍👍👍
I'm curious as to how do you arrange the VTOL nozzles, I'm interested.
This is much better than mine
@CheeseTruffles Brainzźzzzzzzz (Big explode with sound like 3 fps)
@INenormal lol, it's only 412 parts per engine!
@DwiAngkasaAeronautics This was actually inspired by you! I noticed you've been using my V2 version for a bunch of your builds and figured it was high-time I upgraded it.
1600 parts,it's for @L1nus?