


current version : 1.4.4
Be sure to read the instructions before using the product.
Due to repeated updates, some of the thumbnails and the actual builds are displayed differently.
By exploiting the variable function and text labels, it is possible to create a HUD with a certain level of functionality using only one part.
---How to use---
It works by placing this HUD (TextLabel) directly in front of the viewpoint (camera or cockpit) and adding the following variables to VariableSetter.
(VariableSetters is at the bottom right of the build menu. It can be accessed from the [(x)] button to the left of the [Play] button.)
![(VariableSetters is at the bottom right of the build menu. It can be accessed from the [(x)] button to the left of the [Play] button.)](https://i.ibb.co/R4x22Pf/Simple-Planes-2024-07-07-23-53-59.png)
Caution, changing the height or width of the label is not recommended as it may cause the drawing to collapse.
---Variable(necessary)---
Without the following variables, the HUD will not function properly.
HudDistance
This is used to properly position the TD BOX and other displays.
Enter the distance between the HUD and the view point.
If you have changed the part scale of the HUD(default value is 2)
distance/PartScale.UnitType
Sets the unit system to be used for display according to the value entered.
Please choose a value from the following (default value is 0)- 0 : Metric(m/s, m)
- 1 : Nautical(knot, ft)
- 2 : Imperial(mph, ft)
---Variable(option)---
These variables can be used to enable additional features.
TGTPOSLocal(X/Y/Z)
Used to draw TargetDesignator.
Copy and paste from VariableSetters in this build.BulletSpeed
Used to draw Predictor.
Enter the bullet velocity [m/s] of the machine gun used in the aircraft (used for predictor)predict_(X/Y/Z)
Used to draw Predictor.
Copy and paste from VariableSetters in this build.
You do not need permission to use it in your work.
Also, a credit will make the author happy, but is not required.
Specifications
Spotlights
- spefyjerbf 4.2 years ago
- deusalgor 4.1 years ago
- Kennneth 4.2 years ago
- BaconAircraft 4.2 years ago
- MAHADI 4.2 years ago
- RussianAce 4.2 years ago
- CoolPeach 4.2 years ago
- MisterT 4.2 years ago
- Alisuchanka 4.2 years ago
- AWESOMENESS360 4.2 years ago
- RicardoACE 4.2 years ago
- Inuyasha8215 4.2 years ago
General Characteristics
- Successors 113 airplane(s) +1653 bonus
- Created On Windows
- Wingspan 4.1ft (1.3m)
- Length 8.2ft (2.5m)
- Height 4.5ft (1.4m)
- Empty Weight 551lbs (250kg)
- Loaded Weight 551lbs (250kg)
Performance
- Wing Loading N/A
- Wing Area 0.0ft2 (0.0m2)
- Drag Points 127
Parts
- Number of Parts 2
- Control Surfaces 0
- Performance Cost 31

Comment notifications for this build are turned off so I may not notice it.
To everyone who doesn't understand what to do: you add the label part to sub-assemblies and then put it on your own build. You can make it smaller by changing part scale in XML propeties. THERE ARE VARIABLES however, that the HUD label uses, and they are NOT ATTACHED to it. So you open THIS build, open Variables section using the button at the bottom of the screen, and copy everything from there. Then you go to YOUR build, put the label part in place, and then open Variables section, and PASTE everything you copied previously.
If your TD Box (the square that shows the target) is off place, you should adjust HudDistance.
Please read the explanation once before asking a question. Writing the same reply over and over is very tiring
Perhaps the language settings or differences in the OS caused the characters to be garbled...
For future safety, I have updated the xml by correcting the parts that seemed suspicious.
Thank you for your report.
@PlanariaLab sorry, i have already fix it, i've jist removed a □ code frm the funky code
@SumateraIndustries
If you wish, you can send me the build and I will check it.
@PlanariaLab i've do it again with more visual looking detail, and still the same...
@SumateraIndustries
Copying and pasting variables is not working properly.
More specifically, either the name is incorrect, causing a reference error, or the formula is broken during copying, causing a syntax error.
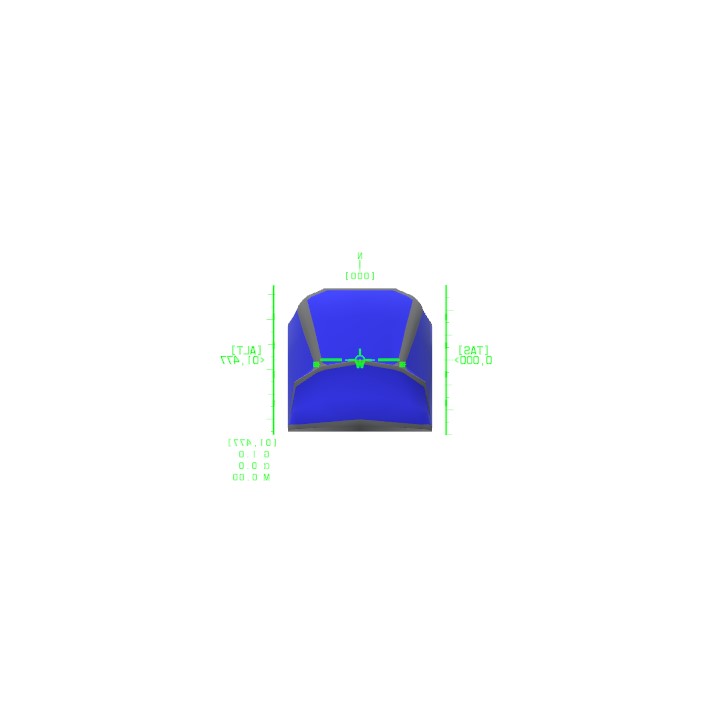
Just have do it all to my F-18 block iii and then i saw a word "<rotate/=>" (yes it's rotate but it's Just like words that are stacked without spaces) under the "W" sight in this image, can anyone tell me what's going on and how to fix it? I've do Copy paste the variabel, and follow the instruction
@Kikikokikomarumaru15000
I haven't been able to do it yet, so I can't teach you...
I'll look into it again when I have time, but please don't get your hopes up...
@PlanariaLab no, I want to know how to point the camera to the selected target perfectly, without considering angle lag caused by SimplePlanes updating the target position variable 1 frame late. Tried my hand on it, failed, and gone a bit insane, so I would like to know how these euler angles work.
@Kikikokikomarumaru15000
Are you asking about how to draw diagonal lines?
I wrote an explanation about this in the past, so please refer to it if you like.
link
I really really REALLY don't know how these rotation axis thingy works. The formulas for the position thingy definitely works, but this is not a good starting point, as all I could comprehend right now is a bunch of letters and symbols. Maybe I'll start asking around.
Hm, I should take this thing apart.
@Dracul0Anderson
1.
Basically, only text can be displayed with text labels, what looks like a line is a collection of hyphens and minus signs.
2.
Inputs can be embedded in text by using {} as shown below.
Throttle={Throttle}
3.
Also, when combined with rich text tags, it is possible to control the position of text, etc.(For more information on tags, search for Rich Text Tags in Unity TextMeshPro.)
<pos={1+sin(Time*180)}>←→
<voffset={sin(Time*180)}>↑↓
@PlanariaLab
How did make this work, more specifically, how did you get the lines(or any normal text) to respond to inputs? I tried studying this on my own, but I can't make sense of it(I'm trying to make my own HUD of sorts).
@VisionAviation @idkwhatosay
I think it's too late now, but I added the unit conversion feature.
Please add the variable
UnitTypeto VariableSetters and set any value. (Details are in the description on this page.)@L3FT2R1GHT
Metric system (default for SP and Unity)... but since ver 1.4.3, I added the ability to change to other unit systems.
.
Regarding the altimeter change mentioned in the comments.
Please find
Altitudein the code and convert it to(Altitude-3.1). (There are 3 places in ver 1.4.3).
If you are using a text editor's bulk replace, convert
Altitude*to(Altitude-3.1)*.(Using
Altitudeas the replacement target will destroyAltitudeAgl)..
As for HudDistance, it looks like your setup is correct...
If the same symptoms occur in ver 1.4.3, please let me know.
@linxiaofeng2339
Fixed it.
Sorry it took me so long to notice.
@L3FT2R1GHT hmm I don't know how
Sorry I couldn't be help
@dabestsock I've tried using ChatGPT for Funky Trees, it was hopeless. Although, it might've been my fault.
@L3FT2R1GHT I would use Chatgpt
That's what I use
@PlanariaLab I scaled this to 0.25 size, 50 cm in front of the cockpit camera, same height, with a hud distance of 2, but it’s a bit off for indicating attitude. Can you tell me how I can fix this?
@PlanariaLab What measurement system does this use, and how can I modify the scrolling altitude so that it displays the output of:
Altitude - 3.1 metres?hey dude, how can I switch it from KPH and meters to MPH and feet? Thx